
Contents
Adding a Single Polygon (Shortcut 'a')
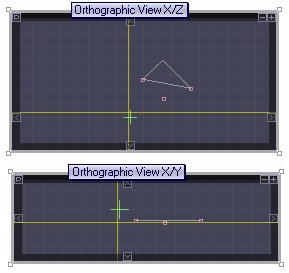
- After pressing 'a' move the mouse over any Orthographic View window and you will see a small red cursor. Click in three different positions to specify the three vertex positions for the polygon.
- When clicking in one of the Orthographic windows you are only specifying two axis positions, for example with the X/Z Orthographic window you are specifying the X and Z position for the vertex. The position for the third axis remaining is always taken from the yellow Locator position.
- Note that in the middle of this process you may click any yellow Locator line over any Orthographic View window to adjust the third axis value.
- Guideline planes and other vertexes will attract the cursor.
- The font face of the polygon is determined by the order in which the points are added, clockwise or anti-clockwise.
- Press ESC to cancel the operation.

Locator
Polygons